~ 3 min read
Porting a Wordpress blog to Jekyll: Part 1
As my last post indicated, I recently made the decision to leave wordpress for jekyll for my blogging software of choice. There were a number of hurdles I had to overcome in order to get to a state I was happy with, emulating my previous blog structure. This first post details a few of the setup problems and how I’ve overcome them.
Using Compass for a Jekyll theme
The first problem I hit was my use of compass to create parts of the theme I intended to use for my blog. When attempting to use jekyll-compass to enable that, I hit the following error:
Unable to activate compass-0.12.6, because sass-3.3.7 conflicts with sass (~> 3.2.19) (Gem::LoadError)After searching for a bit I came across the following issue which detailed a solution - but unfortunately it didn’t work for me. Being somewhat of a newbie to Ruby, I didn’t realise that after creating a Gem as instructed in the fix, I actually needed to “bundle install” it. After a little more digging and tweaking against Mark Turners advice, I ended up with a Gem file like so:
source "https://rubygems.org"

gem 'sass', "~> 3.2.19"
gem 'jekyll-compass', "1.0.6"
Which has finally given me what I wanted.
Using Custom Pygments Themes for Syntax highlighting
Jekyll uses pygments for fancy pants syntax highlighting. Although an example syntax.css is linked to in the jekyll documentation, I prefer a darker theme myself. Jekyll doesn’t tell you it’s possible to generate any one of the numerous pygments styles like this:
pygmentize -f html -S monokai -a .highlight > monokai.cssI’ve used the monokai theme for my own highlighting. There are demos of each of the themes on the pygments site - here is an example. You can then use that as the basis for your own custom highlighting. I’ve created each one of the 19 possible themes and put them up on github.
Moving to Disqus Commenting
Given I now had a static site, I needed a means of continuing supporting comments. Disqus does just that by embedding comments using javascript into post pages. Adding disqus proved to be the biggest hurdle for me. I had a large number of comments from people on my blog over the years and therefore I didn’t want to lose them. After exporting my site as xml and uploading them to disqus, I finally set jekyll loose on my site along with disqus embeds, but I couldn’t see them. The problem I found after a frustrating hour or two of uploading new versions of my site over ftp, was jekyll used a trailing slash (as the post is an index within a directory) to denote links to posts. It’s possible however to do away with this using .htaccess if you’re using Apache.
Options -Multiviews +FollowSymLinks
RewriteEngine On
RewriteBase /
DirectorySlash Off

# remove the trailing slash
RewriteRule ^(.*)\/(\?.*)?$ $1$2 [R=301,L]

# rewrite /dir/file to /dir/file/index.html
RewriteRule ^([\w\/-]+)(\?.*)?$ $1/index.html$2 [L,T=application/x-httpd-html]
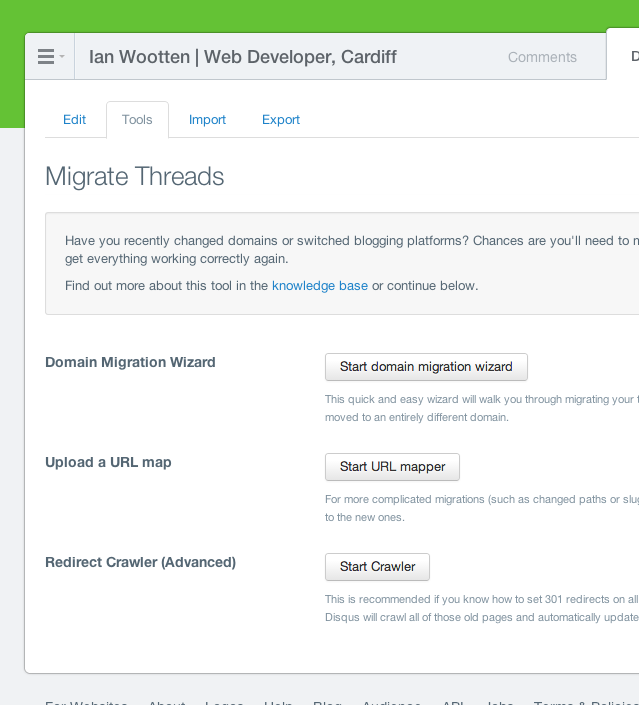
However, when I began using github pages, this fix didn’t work as github only serves static files and doesn’t allow use of htaccess. Instead, I had to resign to the fact that I would have to have trailing slashes (apparently they’re quicker anyway). This then meant I had to use the Redirect Crawler option of disqus’s “Migrate Threads” wizard (seen below) to crawl my new blog on github and determine where the posts were now located.

In my next post I’ll go through how I use plugins to support archive, category and tag pages in jekyll.